Shortest Month

Here we are at the tail end of February and again I’m running behind. It’s not like I’ve got a gazillion things going on in my life or anything! Just a lack of enthusiasm for typing. Or something. Anyhoo, I’ve finished a number of things since last post so here’s the quick and dirty deets.

I had a couple more knit garments that I had cut out last autumn and hadn’t sewn yet. I finally got to it and made a t-shirt, leggings and a short-sleeved tunic in a lightweight green marl. Not sure of the fibre content (possibly rayon/lycra) but there’s plenty of stretch.

T-shirt with curled selvedge neckline and leggings
La Bella Donna Tunic with plain neck

All three layers can be worn together for the full Sherwood Forest effect! Heh. I still have a couple of t-shirts that I cut out back then but haven’t sewn yet. I guess I have to be in the mood for changing all the threads on the serger and coverstitch machines.

Then there’s a couple of jackets completed:

Plaid Pona Jacket

This is the Pona Jacket pattern from Helen’s Closet in the longer version. This plaid denim was a freebee I picked up years ago but never found a use for until now. It’s a bit thick for the Pona but I think it turned out just fine, especially judging by how many times I’ve worn it since I finished it! I used scraps of indigo blue batik cotton for the bias seam finishing:

Pona in progress

The cotton was left over from the lining to my Sewaholic Minoru Jacket that I made years ago, a pattern designed by Tasia Pona for whom this Pona pattern is named. Kind of came around in a circle, didn’t it? Anyway, it took many many yards of bias and I only had less than half a metre left when I was done. Is the game of Binding Chicken a thing? Now of course I want another Pona, perhaps the cropped version in some naturally dyed linen canvas which is also too thick but drapier than the denim.

The most complex project this month was the blue Amy Parka from a pattern by Schnittchen Patterns. I had purchased the dry oiled canvas in 2019 for this jacket but got sidetracked, or maybe intimidated by the thought of sewing with fabric that marks so easily? I luckily had just bought a bunch more wonder clips recently because pins are a complete no-go. At least I was actually able to iron it gently. I used some leftover rust cotton batik yardage in a pinecone design for the lining. And Past-Me was smart enough to have already purchased the long double separating zipper so I didn’t have to go shopping.

The hardest part actually turned out to be the pattern fitting. This pattern comes in two size ranges, regular and curvy, but they are sold separately. As a Betweenie, I always have a hard time deciding which way to go with this since I’m right over the dividing line: get the regular sizes and grade up at the waist and hip if necessary or go with the curvy ones and chop the upper bust, sleeves and armhole down? Neither option works particularly well for my body and I usually have to completely rework the armhole and sleeve cap. I ended up printing out a number of pages three times to grade between the size 40 and 46. And I still needed to do more fiddling after that including raising the underarm seam by a full 2 inches.

So just to be sure I got it all right I decided to actually make a muslin which I never normally do but it turned out to be a great solution. I needed several extra changes on the muslin but only had one tiny tweak to make on the real thing, happily taking in since letting anything out shows needle holes. I also added an interior cellphone pocket and a drawstring on the hood. The finished jacket is darn near perfect except for the lack of seam sealant. It’s pretty water repellant though and will work fine in all but a serious downpour. I almost always have an umbrella with me anyhow.

Blue Amy Parka
Showing off the pine cone lining

There’s quite a bit of the oiled canvas left since I’d bought enough to make the longer version and instead made the shorter one which is plenty long enough on me. The long one would have been down to my calf! I’ve been thinking I might make a rain hat with the leftovers but we’ll see if that happens.

One last thing, I actually finished a knitting project! This pair of socks took the longest to finish ever. Since June 2019 which is just nuts.

Beaded Rib Socks

Don’t know what the problem was really. Maybe Covid stress? The Beaded Rib pattern was just that tiny bit more complicated where I couldn’t easily read at the same time. I also started these for Thom originally but ended up thinking that there wouldn’t be enough yarn to finish them. Turned out I could probably have managed especially after I decided to do the foot almost plain. The rib pattern takes up quite a lot more yarn. Oh well. I started another plain pair of socks for him and he’s happy. They are coming along much faster and yes, I can read while knitting on them. I still don’t really have my knitting mojo back though. Very odd.

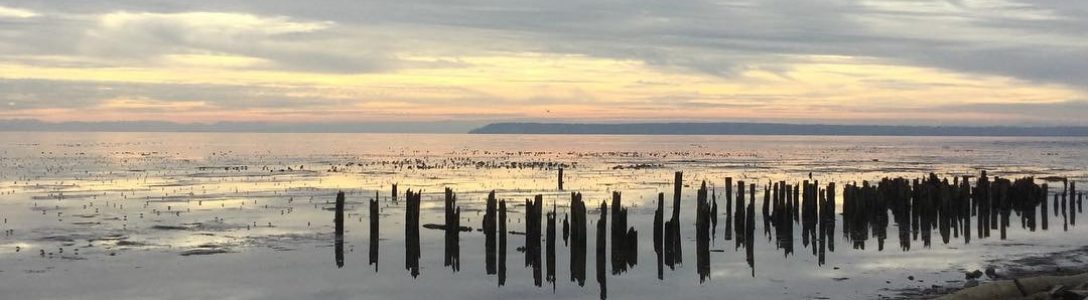
Spring is coming here in Vancouver despite the couple of days of snow we got. The crocuses are out and I’ve even seen a daffodil or two. My rhubarb and garlic are coming up. I’ve still got lots of work to do out there but it’s too wet for me to feel inspired. Indoors I have seeds and soil ready to go and will be starting the Grow Op in a couple of weeks so hopefully that inspiration will hit before the baby plants need to be transplanted outside! The year continues to go around no matter what.

Thom took this on one of our walks!

Is It Just Me?

Or are too many people acting particularly stupid these days? I really don’t understand how you can ignore the practical, logical, sane, proven and functional and instead favour lies, magical thinking and complete bullshit. And although recently it seems like an American problem, there’s tentacles creeping into Canada here and I’m sure other countries as well. I don’t want anything to do with all that insanity. Not to mention stray viruses. I’m perfectly happy to stay home in my creative space and far away from the madding crowd. And may good sense finally prevail! That’s not more magical thinking, is it?

Moving right along. Once I got Janny, the Janome HD5000, back from the shop it suddenly got awfully crowded in my sewing space. With four machines now instead of two, I needed a different setup. I found the desk I wanted from IKEA (Linnmon/Alex) but of course thanks to everybody working from home, they were out of stock. So I waited and waited and finally was able to order it online and pick it up no-contact. And yes, it came completely unassembled so out came the hammer and screwdriver. The power drill with screwdriver bit was especially helpful because there were so many fricking screws!

Alex assembling

Is it just me who finds this challenge rather satisfying? Like giant tinkertoys! Got her done eventually and it just fits in the available space.

Complete!

The tabletop just sits on bumpers on the top of the drawer unit so it was easy to move the latter a little closer to the centre so I can access the electrical outlet on the left. It’s an inch taller than my older sewing table but not really an issue. Covyn, the Janome coverstitch machine just cosies up nicely next to the lip. I also had another go at reorganising my drawers too now that I have five more of them. It was a little tricky plugging everything in however especially since I wanted the Brother to have a surge protector for the electronics. (All the other machines are mechanical and not quite so vulnerable.) And in our old and inadequately wired house there’s only one outlet that everything can go into so I had to get a new power bar. But they’re all happy now.

The Lineup

Everybody has enough elbow room and I can scooch along them on my wheelie stool. Kinda fun! So what have I been making?

I think I missed a few items, such as the two pairs of pants I made for Thom.

WBM Men’s Chinos

This was a kind of Battle of the Chinos except that nobody really won! I made the first pair back in September, the brilliantly named Men’s Chino Pants from Wardrobe By Me, and managed to forget to blog them. The fabric is the same stretch denim in a faded black as my Popped Collar Vest that I did manage to blog about. (And that I’m currently wearing BTW!) The wee hint of stretch, recommended in the pattern, made these very comfortable with the result that he wears them often. I like the single welt back pockets and back darts instead of a back yoke.

See the source image
Chino Pants line drawing
Single Welt Pocket

I did not like the directions for the fly even after watching the video tutorial 3 times! Somehow, the results are dependent on the zipper tape width which doesn’t really work well since my zips seem to be wider than hers. I had the same issue with the WBM Cargo Shorts as well. Obviously I need to figure out a better way to sew this part. Also the front pocket bags didn’t line up with the fly the way it looked as if it should in the instructions. Ditto with the Cargo Shorts pockets not working out properly though I’ve since received updated pocket patterns for those from the company. Haven’t tested them yet. But I digress.

Thread Theory Jedediah Pants

The second pattern is Thread Theory’s Jedediah Pants, also a slim-fitting chino trouser. These ones have a yoke back and jeans-style patch pockets.

See the source image
Jedediah line drawing
Jedediah back

I had a great time drawing up my own T design for the back pockets.

T-Pockets

The fly instructions were nearly as impenetrable as the WBM Chinos but there’s also a video tutorial featuring a very nervous but adorable Morgan! The results seemed to go easier. Which was a good thing since the fabric that I used for these pants is totally weird. I thought at first it was a denim because it’s olive green on the right side and sand on the reverse. However it turns out that the green is some kind of coating that acts a little like wax canvas in that it develops a patina which you can see in the closeup. It machine washed and dried just fine however and the rather stiff hand didn’t change. It was difficult to stitch through and unpicking is impossible because every needle hole is permanent. Slight bits of the sand colour show through the seam edges. Notice how I’m not showing the insides! I couldn’t have sewn this without my heavy-duty Janome machine. I had to use a hammer to flatten the thickest sections of the waistband and belt loops but they sewed through okay. The buttonhole turned out pretty bad though when the buttonhole foot slipped and I had to pick it out twice. The swatch version was near perfect. Go figure. I used lots of fray check on it and hopefully it will hold up totally hidden under the button and the belt buckle!

Thom finds the Jeds just a smidgen tight at the waist even though it’s the same finished size as the WBM Chinos but that’s because of two things: some winter weight gain and the absolutely zero “give” that this coated fabric has. I have no idea how well it will wear or whether the seams will hold up over time. In a more forgiving fabric I would have let out the side seams and lengthened the waistband just a little but that’s not happening. Sometimes you just can’t tell the true fit until it’s all finished. He says they will be worn anyhow and maybe they’ll relax a wee bit. But for a wearable muslin they are just fine.

The true test will come when I go to make the next pair! Then I’ll leave it up to Thom to break the tie. They are similar but different. Both take nearly the same amounts of fabric. Neither one is really any more difficult to make (ahem…depending on sensible fabric choice). Which pattern will he choose?

Washed Away

Life has been somewhat difficult for the last while. For over a week I was pretty much trapped inside with all the doors and windows closed and the HEPA air purifier blasting away. Several days in a row my city beat all other cities in the world (except maybe Portland, Oregon) for polluted air. Yikes! The sky was yellow with an orange sun – when the sun could be seen at all.

Orange sun peeking through smoky tree branches.

I’m super sensitive to smoke and getting worse as I get older. It smelled worse outside than a busy campground on a holiday long weekend! The air temps were quite high too so it was hot in the house without the windows open especially at night even with the fan blowing on us. Ugh. And all we could do was to feel so absolutely sorry for those who lost their homes and businesses and lives in the wildfires. What a horrible year, eh?

Meanwhile, I wasn’t in a very good headspace for creating though I did finish one project. I’m calling this my Popped Collar Vest. Yes, I was too lazy to take photos wearing it myself so you’ll have to make do with these wonky hanger shots! Better than nothing, I say. Bonus: you can actually see the inner bias binding and my nametag!

Popped Collar Vest – front
Popped Collar Vest – back

This is a fairly major hack of Katherine Tilton’s sadly out of print Butterick 5891 which is one of my TNT patterns with not one but two quite different but very wearable and hackable garments in it. After several makes I’ve got both versions fitting just the way I prefer.

B5891 View B from the original pattern

The fabric is a mid-weight denim in a faded black leftover after I cut out a pair of pants for Thom. I had just a little over a metre of 52″ width and managed to squeeze this vest/sleeveless jacket out of it with some fancy Tetris work. I used one front piece and mirrored and lengthened it a lot. The back kept the asymmetrical back seam which left me enough room on the fabric to just cut out the front facings. I skipped the peplum and used the under collar pieces as a collar facing instead. The pockets are the original inseam pieces but used as two patch pockets, basically to cover a large flaw on the front piece. All raw seams were either reverse flat-felled or bias bound with striped bias strips and I used some to make the rouleau loops for the buttons. I didn’t really have any suitable buttons but Thom had some wooden button slices left from another project so I painted them with liquid acrylic and finished with a polymer wax. I don’t know how durable they’ll be but they can always be replaced with something better when I can get back into Dressew. Some day. Soon. Meanwhile it’s been good to use up stash!

I still haven’t sewn the pants for Thom yet but they’re all cut out and ready to go. The pockets are going to be wildly contrasting with the faded black denim (aka dark grey). More on this project when it’s done.

So now the air is fresh again thanks to the rain. The windows are all wide open again and I can breathe! Today was very nice so we were able to get out for a walk which felt really good after all that sitting about indoors reading endless books and perusing Pinterest. Tomorrow I finally get to mask up and go pick up my new glasses! Yeah, it took 3 whole weeks. My optometrist is not fast or cheap but they are good. Anyway I’ll be particularly happy to have my distance sunglasses back for walking. It’s hard to see where my feet are going with progressive lenses. The ground nearby is blurry unless I walk with my head down awkwardly. I use only my distance prescription for my sunglasses which works very well.

Hope everyone is staying well! Wear your mask…blah, blah, blah…

Kalle Take Two

I wasn’t especially happy with the fit of my first Closet Core Kalle, the cropped version that I showed in the last post. I decided more work was necessary at the shoulders as well as going up one size in the upper chest area front and back for just a wee bit more wiggle room. It was quite an involved process since I was combining several adjustments at the same time: sloped shoulder, forward shoulder and high round back. All this changed the shape of the back yoke quite a lot and also took a large wedge out of the front shoulder seam. I took a little more from the back armhole by nibbling another wedge out of the back bodice at the armhole edge. In order to counteract some of the narrowing that all this caused on the sleeve, I lowered the underarm where it curves from the sleeve into the body of the garment. All this in turn necessitated remeasuring the cuff pieces. I had to add to the back cuff and take a little bit away from the front one. Whew! In the end though, the fit is a whole lot better.

Kalle Dress Version
Kalle Dress Back

This time I decided to make the dress version of the pattern with the pop-over button placket, collar and inverted pleat. I used the narrower band collar piece for the collar stand and shaved 3/8″ off the collar to match because I thought the original collar was a bit too oversized. I also added 2 pockets instead of one because otherwise this dress has no pockets. Should have put inseam pockets in, shouldn’t I? Next time for sure. The fabric is a narrow handwoven, tie-dyed and batiked cotton from deepest stash. Must have been lurking there for at least 25 years! Bright and cheerful enough for you? Even though the patterning is completely funky and there was no matching anything anyhow, the fabric was quite lovely to work with and pressed and sewed like a champ. The buttons were little turquoise plastic ones salvaged off something ages ago and they matched very nicely.

The fit on this second Kalle is very much improved! As well as the shoulder changes, it grades from a size 12 at the neck to a 14 at the bust, 16 at the waist and 18 at the hip. Four sizes is quite a large range, eh? Also this is the dress pattern as drafted for 5’6″ and I’m only 5’3-1/2″ and it’s still quite short, although I suspect some of the extreme hi-lo hem curve has been removed since the pattern photos. Anyhow, all my adjustments worked like a dream even though they had me scratching my head whether or not I did it all correctly. Yay! Now I have another good pattern to add to my collection. I may succumb to a tunic version yet! I wouldn’t mind experimenting with long sleeves as well but don’t think I’ll be buying the expansion pack that Closet Core has available. A simple sleeve, tower placket and cuff shouldn’t be hard to draft myself and save the cost (which comes to over $9 CAD) to put towards something else. I’d still have to adjust the upper edge for my revised sleeve opening and shorten the length as usual for my T-rex arms anyway plus I already have a tower placket pattern so why not DIY?

So then there were about 2 yards left of the fabric so I decided to make another wearable muslin, this time for Thom. I tried out the Wardrobe By Me Tropical Shirt. The only fit adjustment that I made was to straighten out the waist curve because he’s pretty much the same measurement at chest, waist and hip. (Unlike me!) I did debate with Christina from WBM about her pattern sizing for men which I have found rather confusing but haven’t really gotten a satisfactory answer apart from “European sizing is different” and “Euro men are smaller”. Uh-huh. Thom’s 40″ chest which is a size M practically everywhere else is an XL in WBM sizing. The largest size offered, 3XL, is only a 45″ chest which seems a rather limited range to me, at least on the top end, whatever you label it. Anyway the finished measurements were what he expected so that’s what I made. And was just able to squeeze it out of the remnant piece.

Tropical Shirt
Tropical Shirt Back

There was no way to choose where the patterns ended up since there was so little fabric to work with. My friend Melanie says he has owl eyes! Hah. Now you can’t unsee that, can you? Instead of the pocket pattern I used a spare one that I’d cut out for the Kalle and decided that it wasn’t looking right there. It works fine here. There’s only tiny fabric scraps left, which is what you want, right? Thom is quite happy with his new shirt and it’s now dubbed the Aloha Shirt. He says he will wear it while holidaying in Las Livingroom and Puerta Backyarda! There will be more, especially as his collection of short-sleeved summer shirts start to wear out. Some are upwards of 15-20 years old now and the best ones are linen, ramie or a linen/cotton blend. He wears them all the time when it’s warmer, preferring them over t-shirts because not only are shirts cooler, he can keep his glasses in the pocket.

One change I might make to this pattern in future is to add to the 1cm (3/8″) seam allowances at the side-seams and the top of the sleeve so I can sew flat-fell seams instead of having to overlock them. So much nicer inside and more durable for shirts. I used flat-fells on my Kalle which was easy because it started with 5/8″ seam allowances. On the dress the seam finish was even flexible enough to accommodate the curve under the arm where the body morphs into the sleeve but I did have to clip a little into the seam allowances underneath the top of the folded layer before stitching it down to get it to lie flat.

So what’s next? I seem to be on a bit of a sewing roll! I suddenly decided to use my lac-dyed linen/rayon for a longer version of the Peppermint/In The Folds Button-Up Dress. More on this one soon. I’ve made a few changes to it since I made the first version (which does look suspiciously like a copy of the pattern photo). I wear it a lot but it’s short and I hate the facings. I hate ALL facings! They never cooperate and lie flat or stay put. Give me bias binding over facings any day. There will be bias. Okay, I’m done!

Next Project

Take good care, everyone! Wash your hands, stay 6 feet/2 metres apart and wear your damn mask! It’s the least we can do.