Without Further Ado

I’d like to present The Peacoat Project:

The man asked for a peacoat like Jimmy Perez on the murder mystery series “Shetland”. Neither of us had any idea how much work this was going to be! Nearly a month and about $200 worth of materials later, his dream became a reality. He gets his coat while it’s still cold enough to wear it and I get sore fingers and a whole lot of new appreciation for tailoring. My goodness it’s a lot of sewing! Of course it’s partially my own fault. I couldn’t just follow the instructions that came with Thread Theory’s Goldstream Peacoat pattern could I? No, I had to do it PROPERLY! Hah.

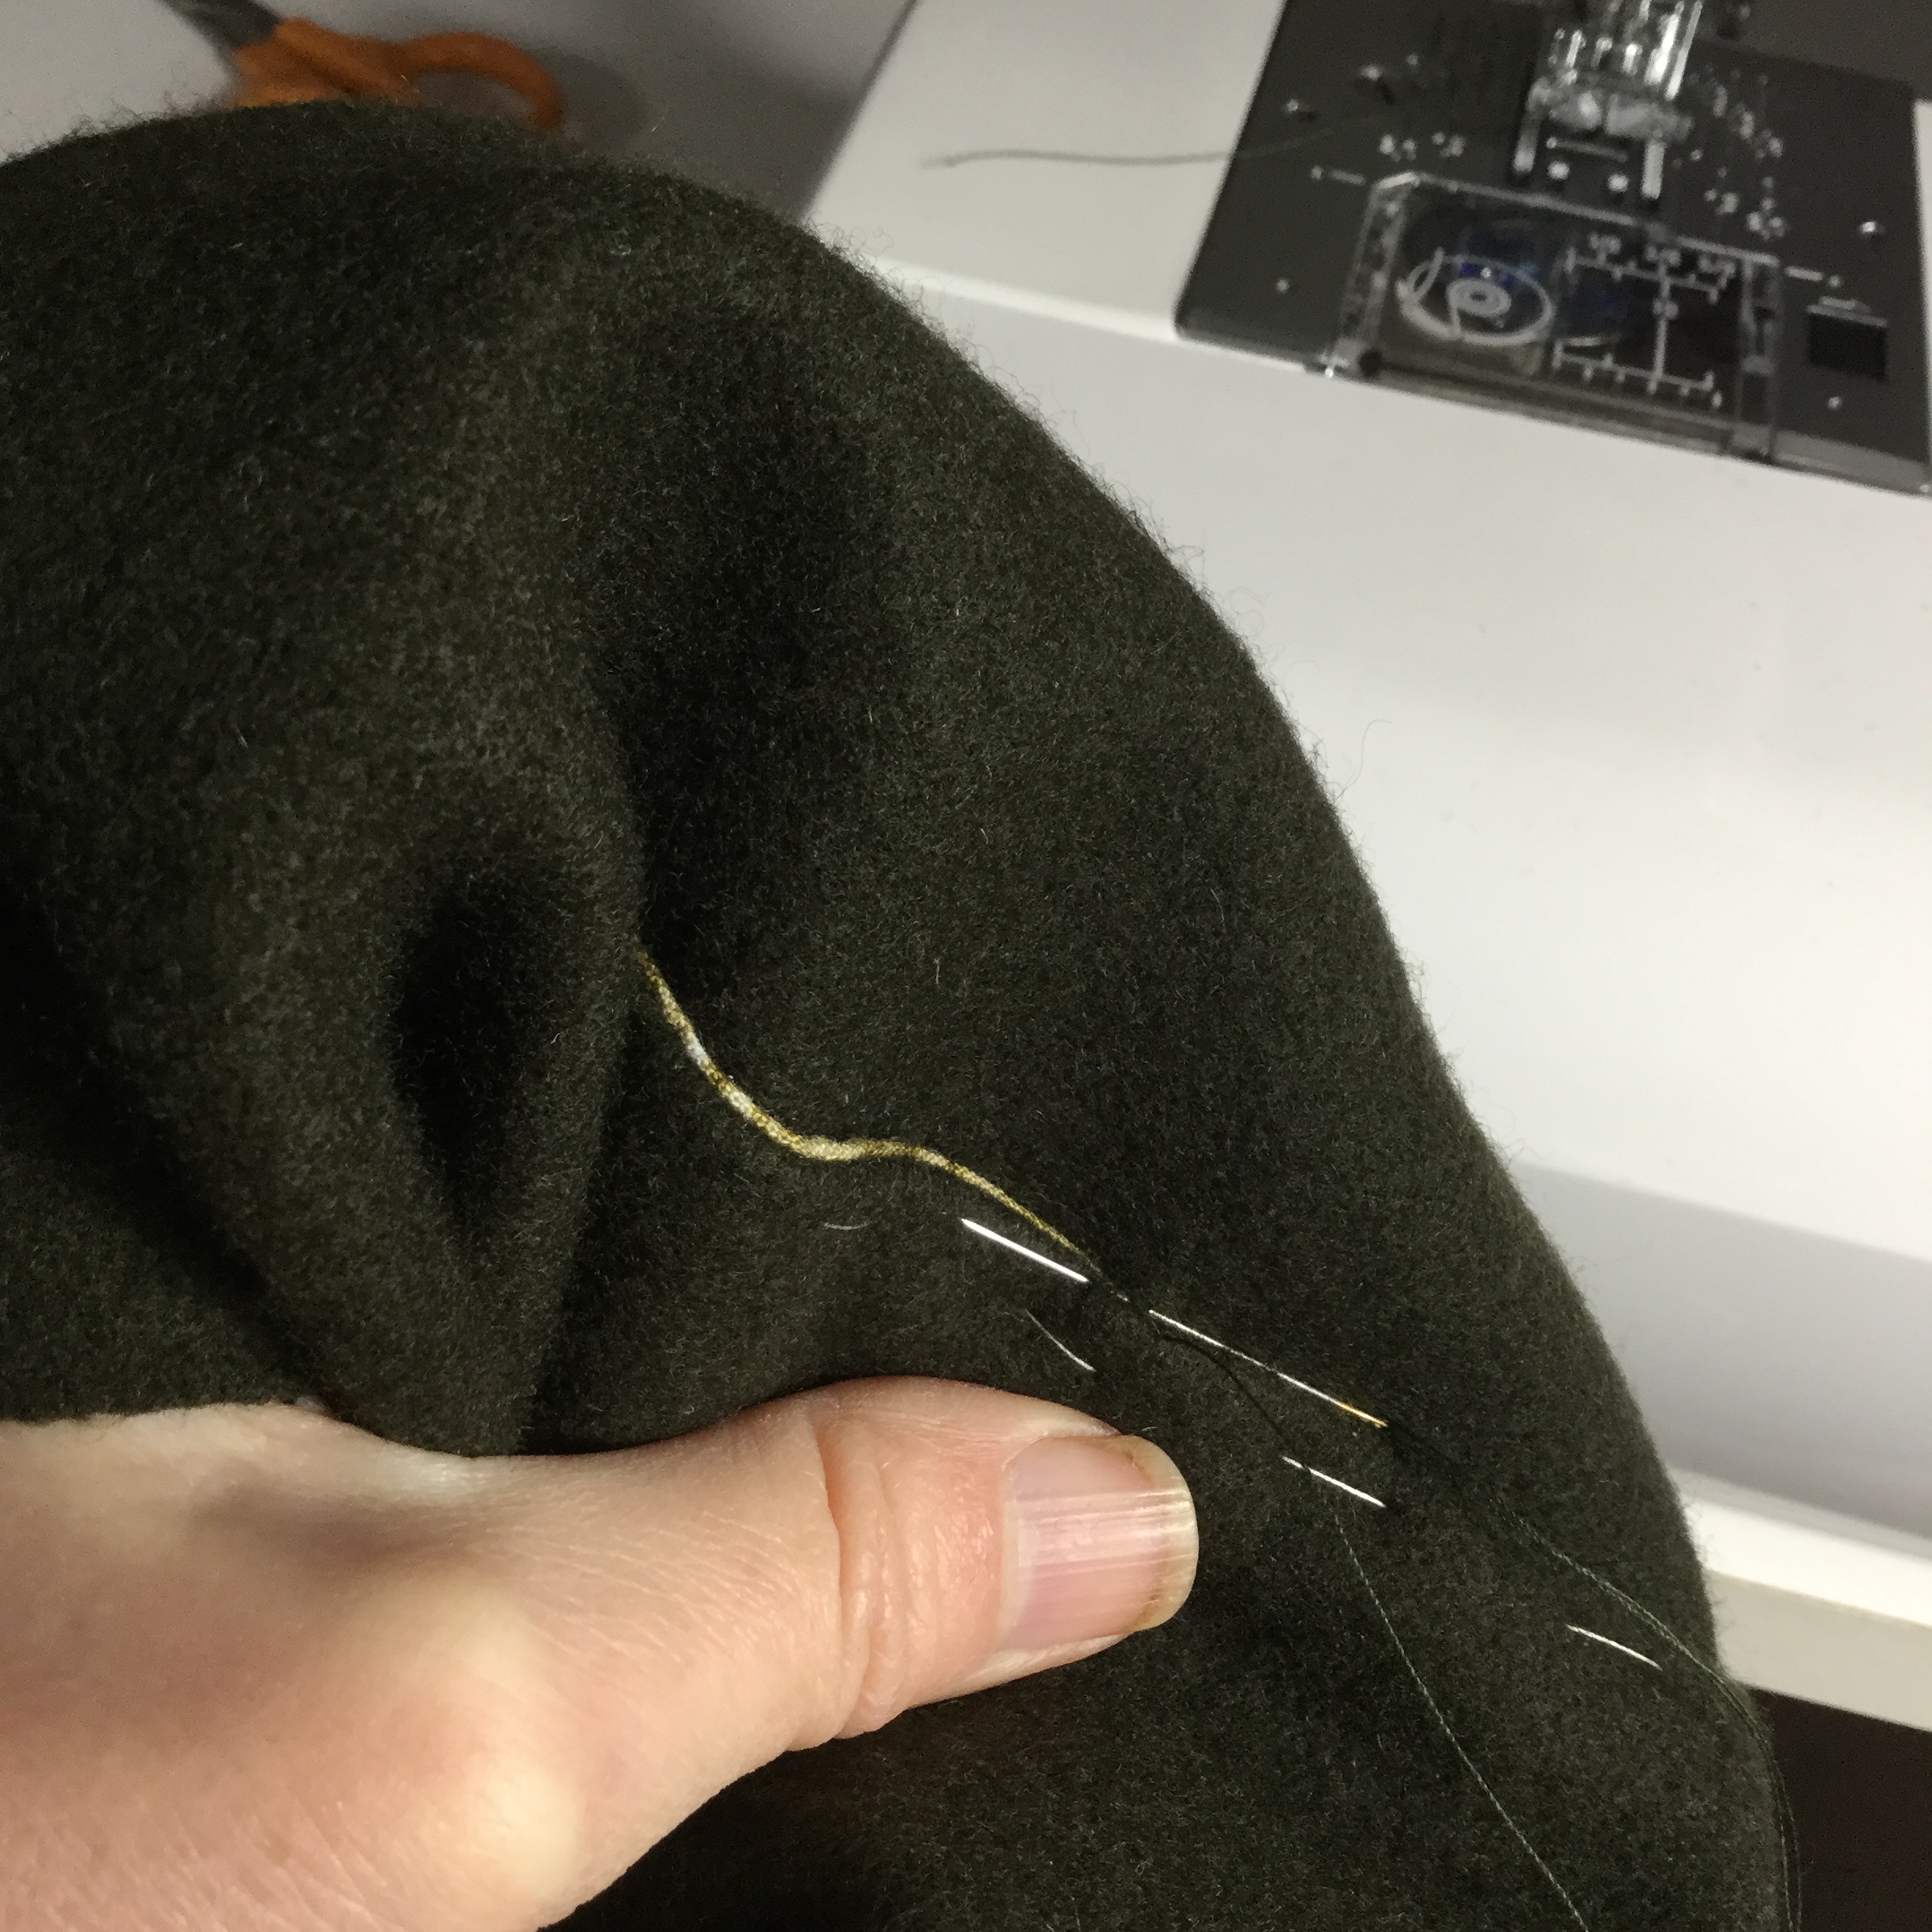
I’ve done coats and jackets before of course. Back in the day I didn’t realise that the interfacings were so important to the shaping of garments and help to give it body and firmness that you can’t get otherwise. I was always a little – or a lot – disappointed with my makes. But this time I decided to learn all the heavy-duty stuff, like hair-canvas, chest shield, sleeve heads, basting, taped roll-line, hand-made shoulder pads, steam shaping, hand-stitched buttonholes etc. This is Hard Tailoring, in both meanings of the term. Thom helped me pick out the really nice wool blend Melton cloth in a dark olive green and had a blast choosing the coordinating quilting cotton lining featuring a cabin in the woods, canoes and a whole lot of forest animals. Then there was all of the interfacings, threads and buttons too. Lots of parts to put together. Oh, and if you’re ever wondering – Melton cloth is woven and then fulled, brushed and sheared so it sort of looks like felt but has an underlying woven structure. Unlike felt which is just fibres interlocked together randomly. Melton does have a right and a wrong side. The public (right) side is slightly less fuzzy and you can just barely see the woven threads whereas the wrong side is more felted-looking. I don’t know if it’s critical but I cut the coat out with-nap, everything facing one way, just in case it showed in the finished garment. I don’t think that was necessary though.

It was kind of daunting, I’ll admit. I started off with a lot of “analysis paralysis” and dreamed of sewing all night long for a week! I did a lot of research in the two tailoring books I bought and also online photos, tutorials and videos. Once I settled on how I was going to proceed it went a lot better. Just concentrating on one part at a time. All of the hand-sewing was actually quite soothing and much easier than when I had to wrestle the beast under the sewing machine! It’s approximately one-third machine and two-thirds hand-stitched.

So now that it’s all over, I’d like to thank my cast and crew of this endeavour: Janny the sewing machine, Loopy the serger and of course Debbie Double my dressform without whom this would have been impossible. Even if the coat didn’t actually fit her shoulders very well she held up under the pressure! And speaking of pressure, Chi-Long the steam iron and the rest of the pressing tools did their important part too:

Iron, sleeve board, ham and clapper/point presser

And let us not forget the little things that made the sewing a whole lot easier:

Small but necessary sewing tools

Clockwise from the top-left. This project was the first one where I needed to use the small wonder clips when pins were just not adequate. My wrist pincushion now needs replacing with a better version (I stabbed myself right through it a few zillion times) and I need to sort my very fine pins which tended to get bent in the thick coat fabric. It was fun to use this vintage silk thread for basting. It just pulled right out when it was no longer needed and didn’t leave a mark if you ironed over it. My little Clover leather thimble is the first thimble I’ve ever had that I actually use properly. It’s comfortable on my middle finger, stays on (unlike metal ones) and I forget it’s there after awhile. Judging by the wear it also saved my fingertips! The wee box of Thread Heaven is a treasure since it’s not being made anymore. It has a different effect on thread (preventing tangles) than the wax (strengthening). All depends on where the thread needs to be used. And the water-soluble marking pencil holds up under ironing but disappears with a little dab of water. Turns out I like it (and it’s pink and blue siblings) better than other markers of which I have quite a few. I can tell because it keeps getting shorter. Not shown are the several different hand-sewing needles that I made copious use of daily.

Today I’ve been taking a much-needed sewing break in order to get all of my notes finished. I cleaned up the studio all ready for the next project. I already have 2 more warm pullovers cut out for Thom using the patterns I’ve done before, the North Star from Love Notions and the Finlayson from Thread Theory. Yes, I’m sewing for him again! He’s definitely sew-worthy! And not to worry, I’ll be back to selfish sewing and other things too before long.

You’ve seen this before but…now it’s finished!

Quick Catch-Up

Still plugging away at the Goldstream Peacoat. It’s been a big job! Bigger than I expected going in anyway. I’ve ended up hand-sewing a whole lot more than I originally planned both because I have more control over the stitches and because it got pretty darned hard to get this beast under the presser foot! I ended up having to move a bunch of stuff off my sewing table because it all kept ending up on the floor as I wrestled the coat around on the sewing machine. I have to say that Janny the Janome held up very well to this thick fabric plus layers of interfacing. As long as I could get the thing under the presser foot it would sew through it. I only ran into an issue (bobbin thread nests) as I was doing the topstitching on the fronts and around the collar. Probably because I was turning the whole coat around with the needle down. Not perfect but done.

Here’s a couple of teaser photos so you can see the lining. Debbie Double is wearing the coat inside out!

Coat lining with inside pocket
Back facing with my label

Lots of critters in them thar woods, eh? I edged the lining with flat piping made from the sleeve lining fabric and I think it looks pretty neat. Now I’m sewing the sleeve linings which are the last pieces to assemble and sew in. By hand. Of course. All that’s left after that are the buttonholes and 3 buttons. Also by hand. Of course. It’s still going to take a few more days before this thing is completed. I’m kind of ready for it to be finished now.

One other thing I did was to begin a new pair of socks to try out my wee ChiaoGoo Shorties. They work quite well for me, at least on this simple basic sock. I used some DBG Confetti yarn that I totally love because it wears really well but is now discontinued. Boo-hoo. Self-striping socks are so old-fashioned now, aren’t they? I still like them though. What I don’t like is the stitch marker! The thickness leaves a bit of a ladder in the knitting which you might be able to just detect there above the pink marker. Changing it out for a thinner one now. Besides pink is my least favourite colour.

Self-striping socks on a 2mm tiny circular


A Tale of Two Interfacings

Well, actually three interfacings but first we’ll discuss the two different brands of fusible hair canvas that I bought.

Hair canvas, two kinds.

I know it would be helpful if I knew which brands these are but unfortunately I didn’t note that down! The top one is more grey in colour and also more expensive at $15.99 per metre. I bought that one at Dressew. The bottom piece is a lighter colour, slightly heavier in the hand (but that’s mostly due to the beads of glue on the back) and cost $12.98 per metre at Fabricana (Richmond, BC). Both types were around 20 – 22” wide, so quite narrow as fabrics go. Per square metre they are more expensive than my main fabric. Even the cheap one.

Now comes the truth! The first more-expensive one was easily and successfully fused to the coat fronts and the collar pieces. It held the roll lines really nicely when I allowed it to cool and dry into shape. Just as if I had actually spent time pad stitching the shaping in as you would for a non-fusible but way less work! I had planned to also interface the facing pieces which on this double-breasted style are quite wide and could use good support. Unfortunately I didn’t have enough of the original type of canvas so when we went out to Fabricana where I bought the weft-insertion interfacing (because Dressew didn’t have any) I picked up another metre of whatever brand of hair canvas it was that they had available there. I used the exact same fusing technique that I did on all the other interfacings but this stuff did NOT want to stick to my wool blend melton cloth. It bubbled badly and you could not only feel it but see the pimpling when I tried to fold the roll line. Didn’t hold its shape either. Grrrr….

Obviously not the same product at all! And a complete waste of my money. How can you know these things though unless you test them? It’s not like the store will sell you a tiny test square of each kind! The only upside was that it peeled off my facing pieces without damaging them. Much too easily in fact because I didn’t even need to use the iron to soften the glue. Boo. Binned. So now what? I decided to use the weft-insertion interfacing on my front facings instead.

Suitmaker 602 weft-insertion fusible interfacing

I did manage to remember the name of this one! I also like it a lot. The 602 is the heavier version. (There’s also a lighter weight 601.) The fibre content is 78% viscose/22% polyester and this is the “black”. It’s much darker IRL but not really completely black. It fused easily with lots of steam and pressure for about 12 seconds and didn’t leave any glue on Chi-Long’s foot. The results are a thicker, non-stretchy but still flexible fabric. You can’t even see a line from the front where a partial interfacing piece ends. This is good stuff. Luckily I bought 4 metres (at $7.25 per metre if you’re keeping track) and I’m glad I did because I don’t have all that much left now. This peacoat is seriously interfaced out the wazoo. Did I mention how much I love Chi-Long, my new iron? He is so steamy!

Fusing the back stay

I was also working on the front pockets. I basted and hand-stitched around to tuck in the lining so it wouldn’t show at the edges.

Slip-stitching the pockets

Hey, my nails are pretty clean compared to what they look like in gardening season! Which is coming up soon. When it stops snowing. But I digress. I also topstitched the patch pockets using the triple stitch and regular thread. I tried some heavier topstitching thread but because I couldn’t get a good colour match it just didn’t look right. I may be using it for the hand-stitched buttonholes however. Not thinking about that right now. Anyway, the pockets and the flaps are on and looking pretty good. I’ll really show you the lining as soon as I get to that point. It’s very manly. Heh.

But next? Some actually assembly perhaps?